When you open a report via the TeamSpace, you enter the so-called report execution mode. This mode allows you to configure the selected report and export it in different formats. You can also automate exports and have the report sent to you by email via scheduling, e.g. daily or weekly at a specific time. In the following, we explain how report execution mode works, which is common to the various report types.
Report execution mode is essentially divided into four areas. At the top, a toolbar provides access to the following functions:
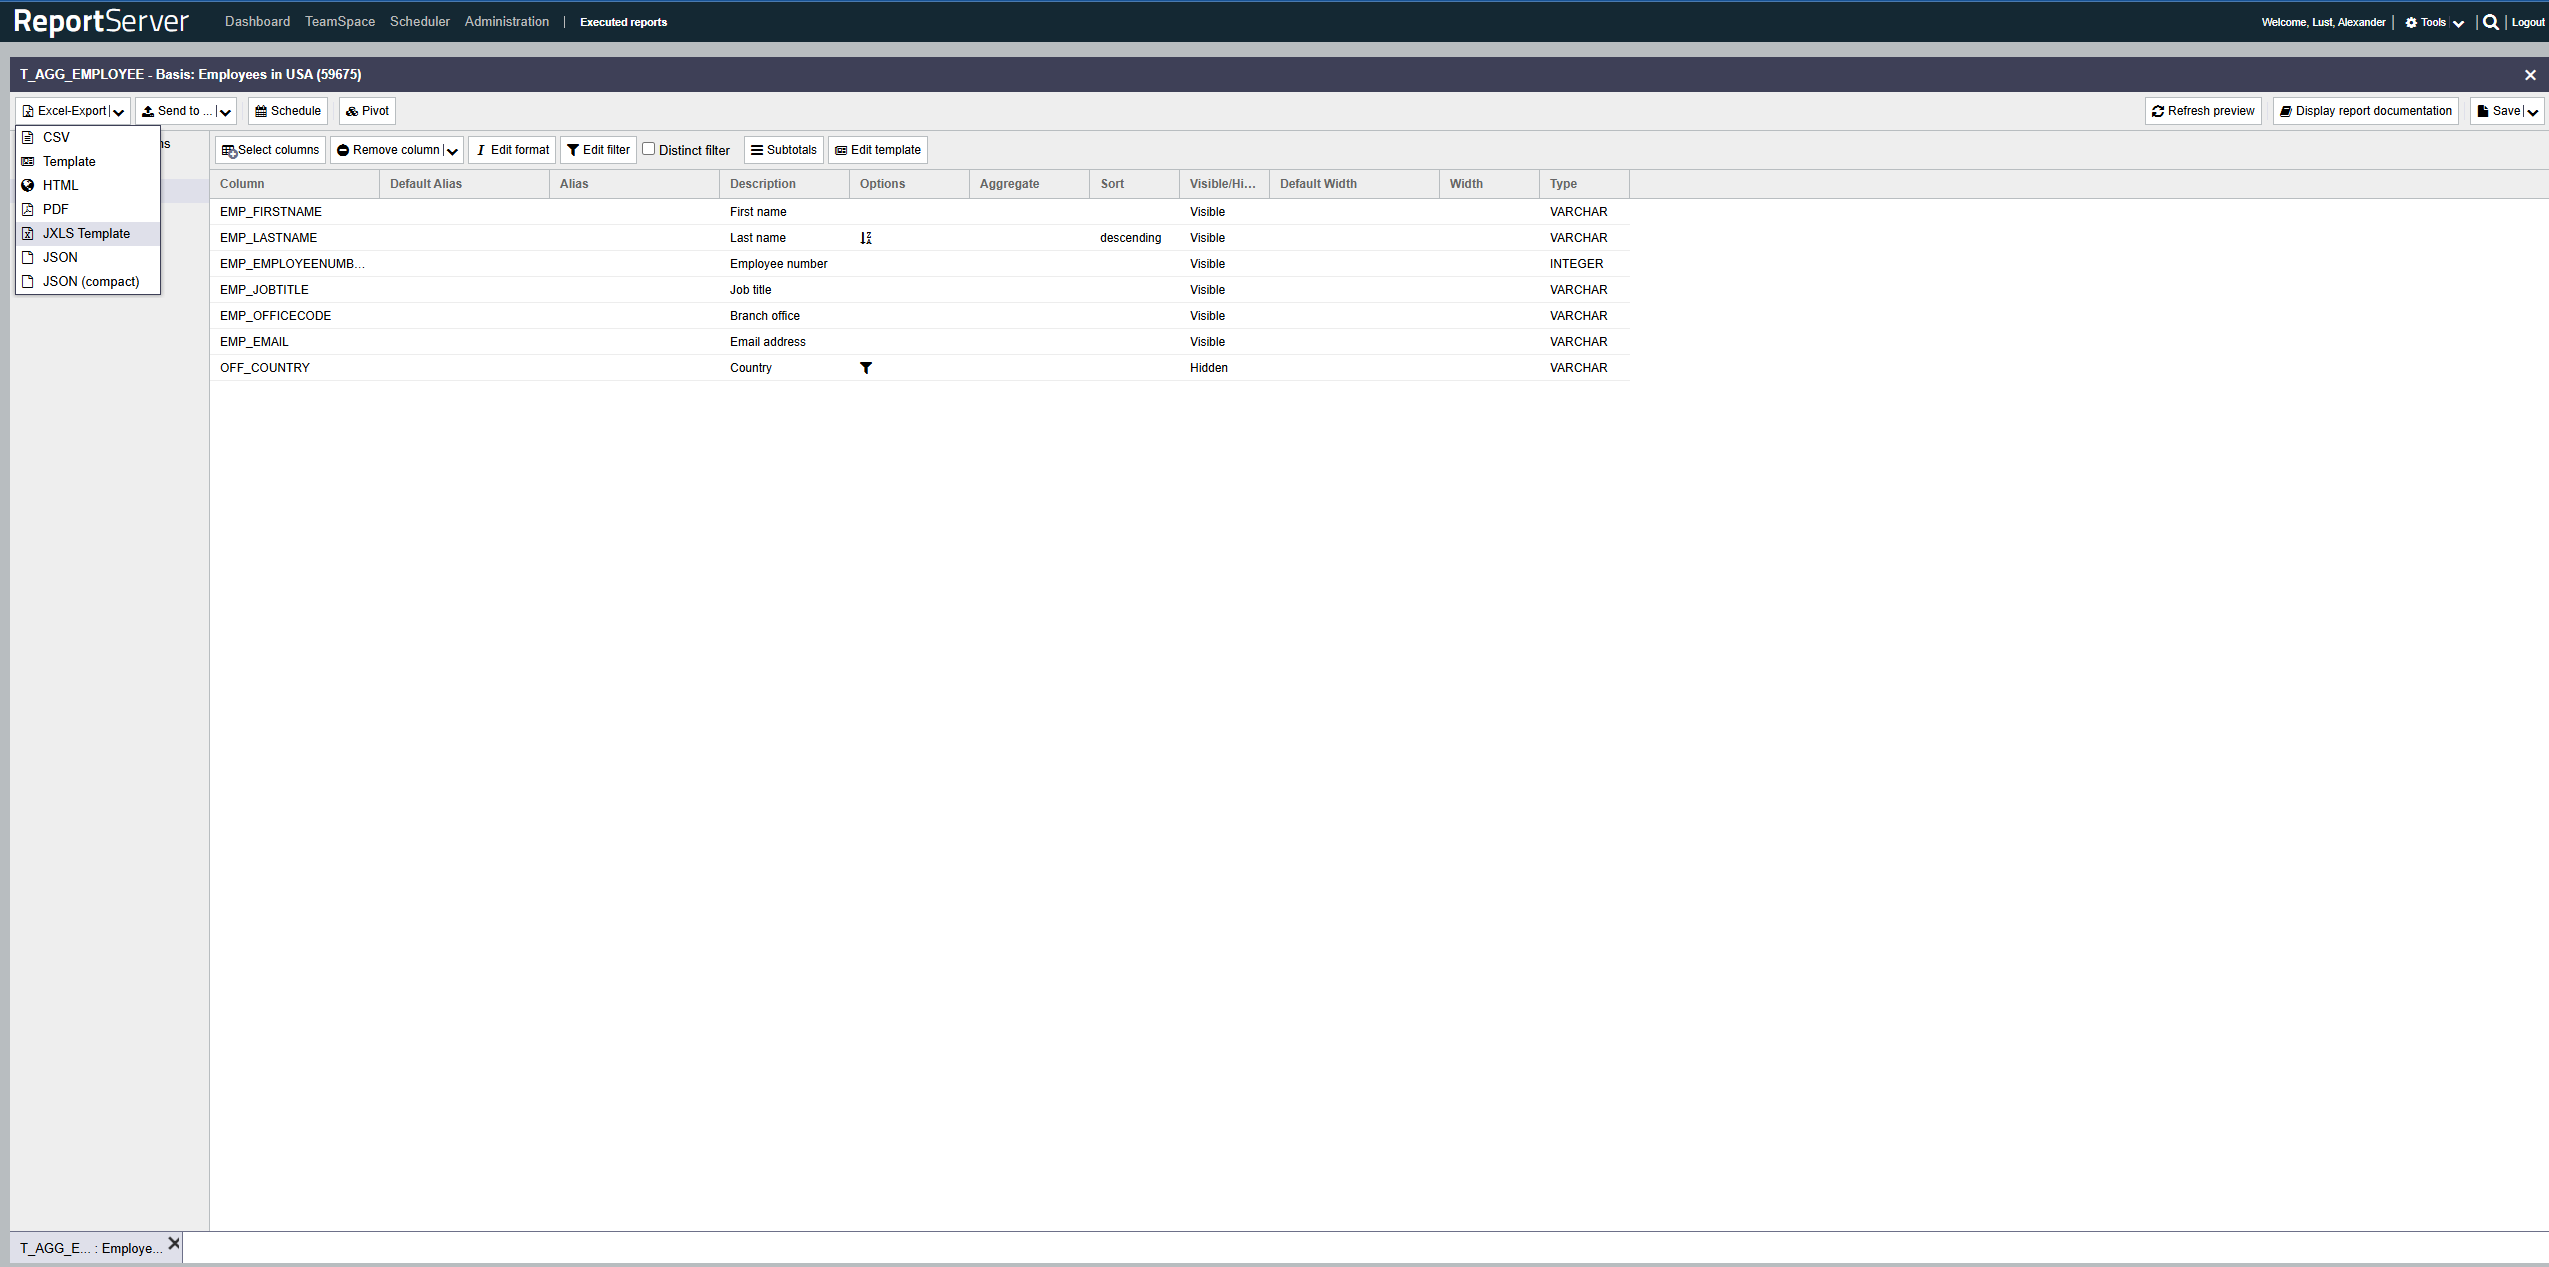
| Export | Allows exporting to different formats. The available formats are determined by the report type. |
| Send to | Allows you to execute the report and send the result by email or save it in the TeamSpace. |
| Schedule | Using Schedule, reports can be executed on a time-controlled basis (e.g. every third Monday of a month). |
| Pivot | Activates pivot mode (e.g., in dynamic lists). |
| Display report documentation | Shows the documentation associated with the report. |
| Save | Allows you to save a variant of the report. All configuration changes made are saved. |
At the bottom of the screen you will find a tab for each open report. If you have multiple reports open at the same time, these tabs allow you to quickly switch between them and close individual reports.
The main view is usually divided into two areas. On the left side you will find the available aspects. In the center you see the corresponding view. Each report type has at least the aspect. Further aspects, such as Parameters, allow you to make settings for the report. If only the Preview aspect is available, the left bar is hidden.
Report developers can provide reports with parameters that allow the report to be configured further before execution. If a report has parameters, you will see the aspect on the left in report mode. Select it to configure the available parameters. The layout of the parameters page may differ in detail depending on the report. In general, however, it consists of a set of input fields and possibly additional explanatory text.
Parameters can be prefilled with default values. To reset a value to its default, right-click the input field and select from the context menu. The following parameter types may occur in reports:
The simplest parameter type is the text parameter. It provides a text input field for setting the parameter value. Depending on the configuration, the field may be required to follow a specific format (e.g. minimum and maximum length, or digits only). If the input does not match the required format, the field is highlighted and an appropriate error message is displayed.
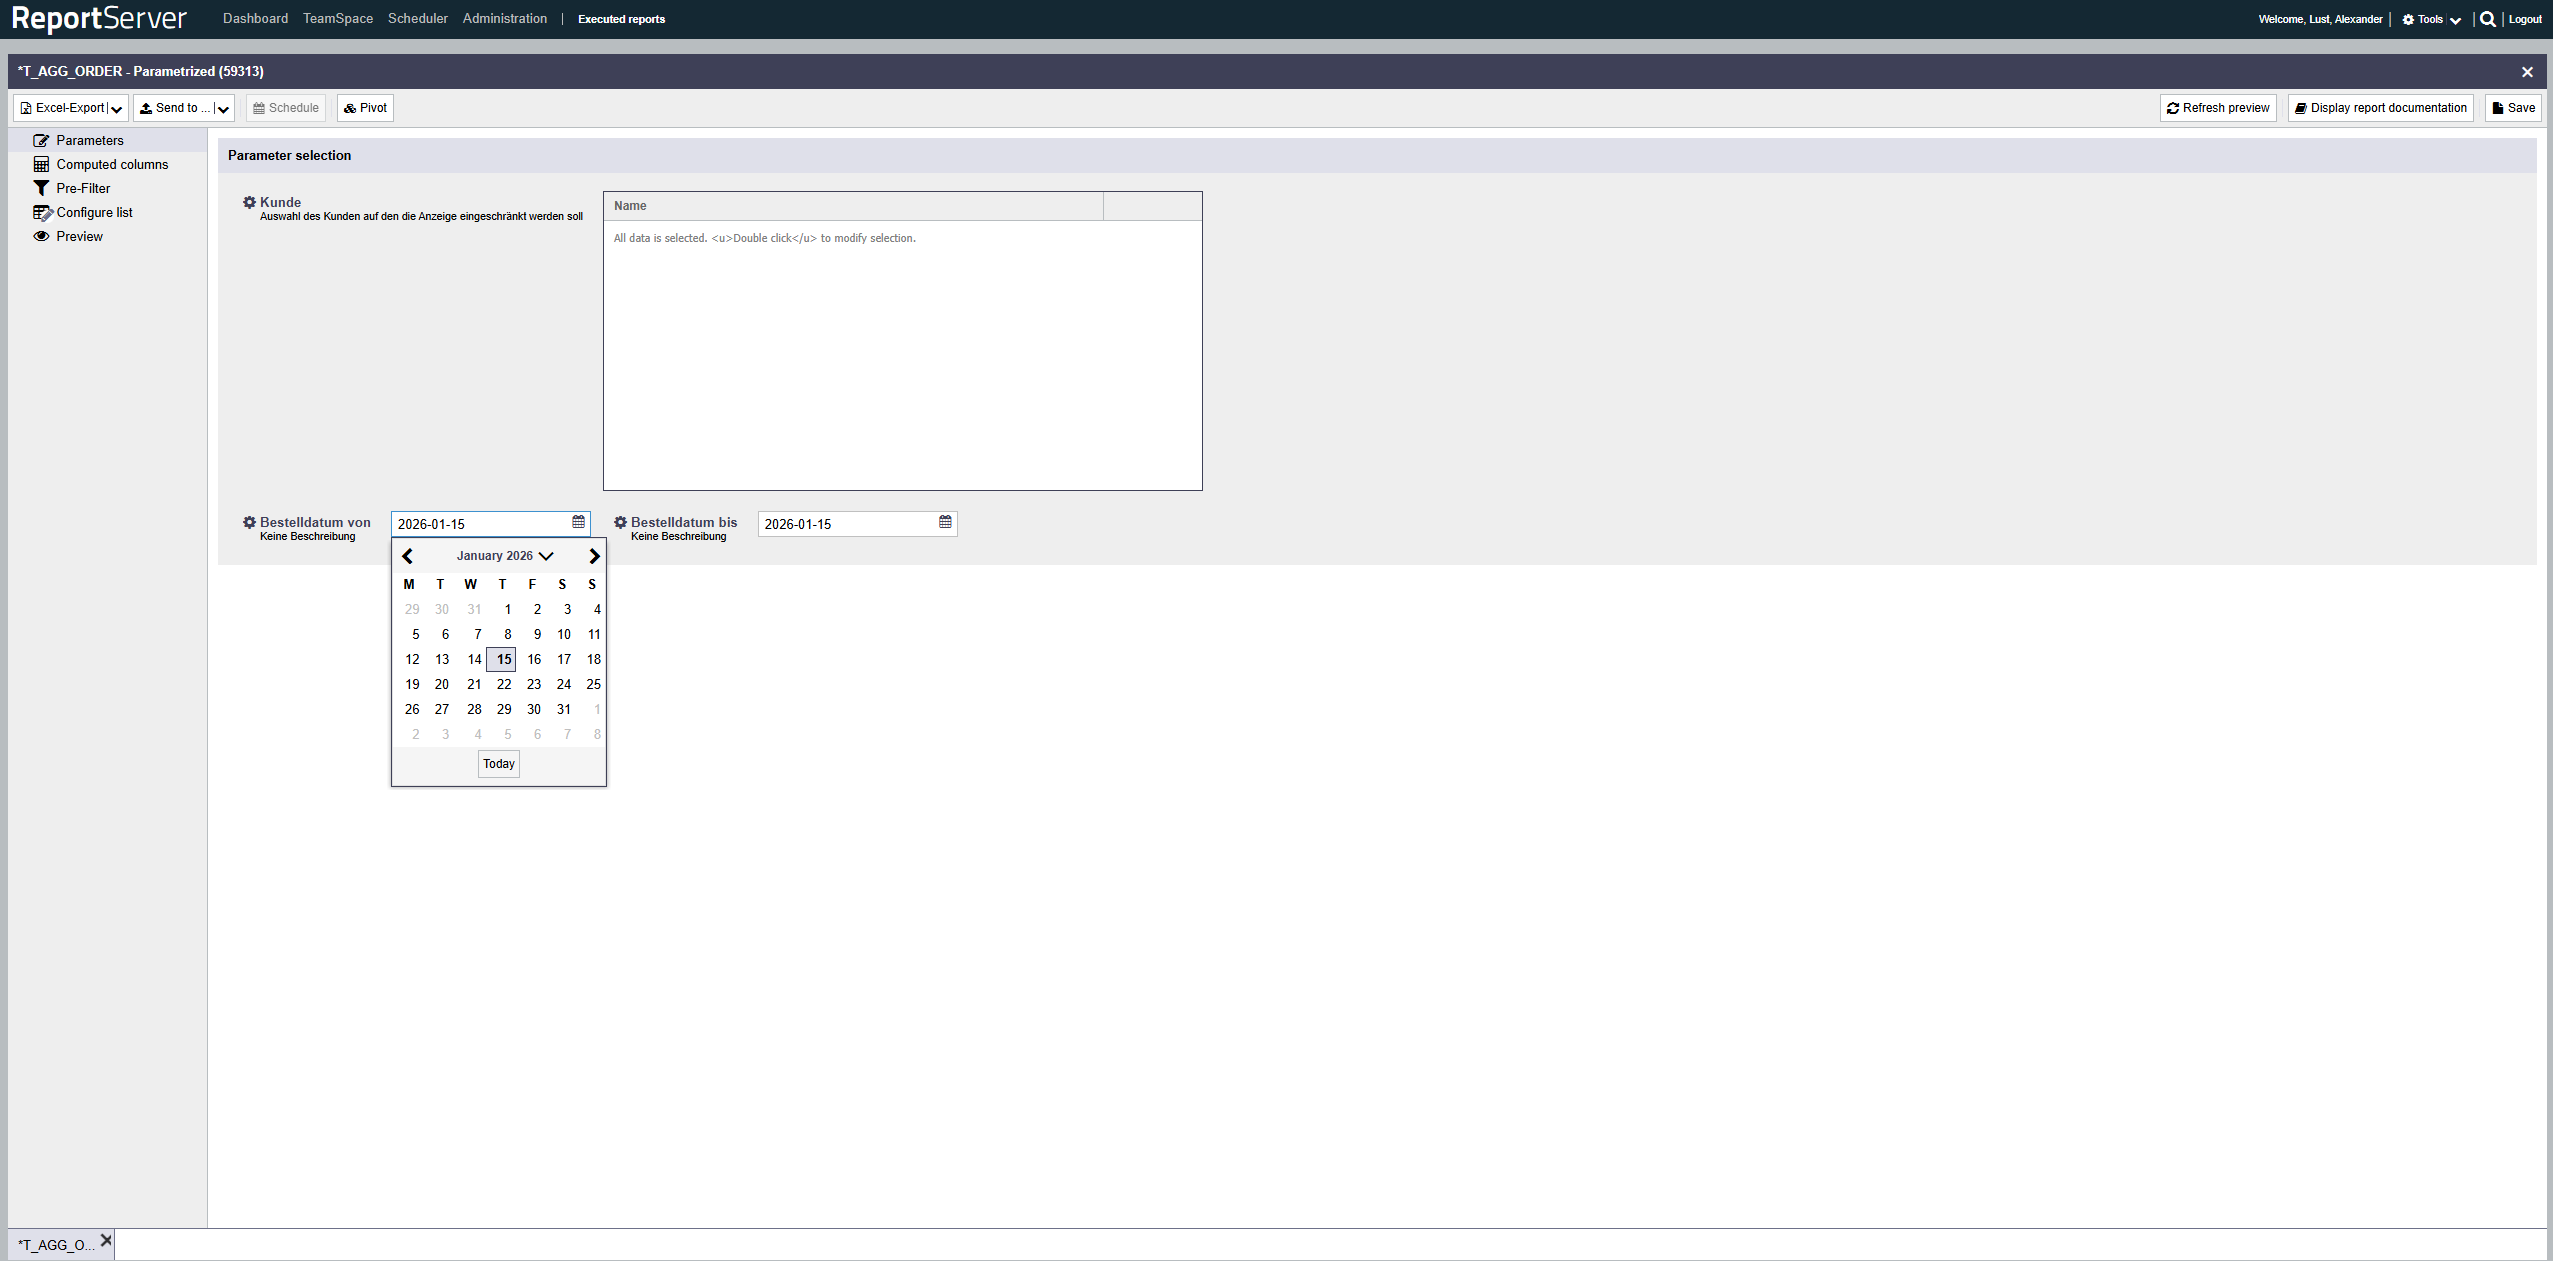
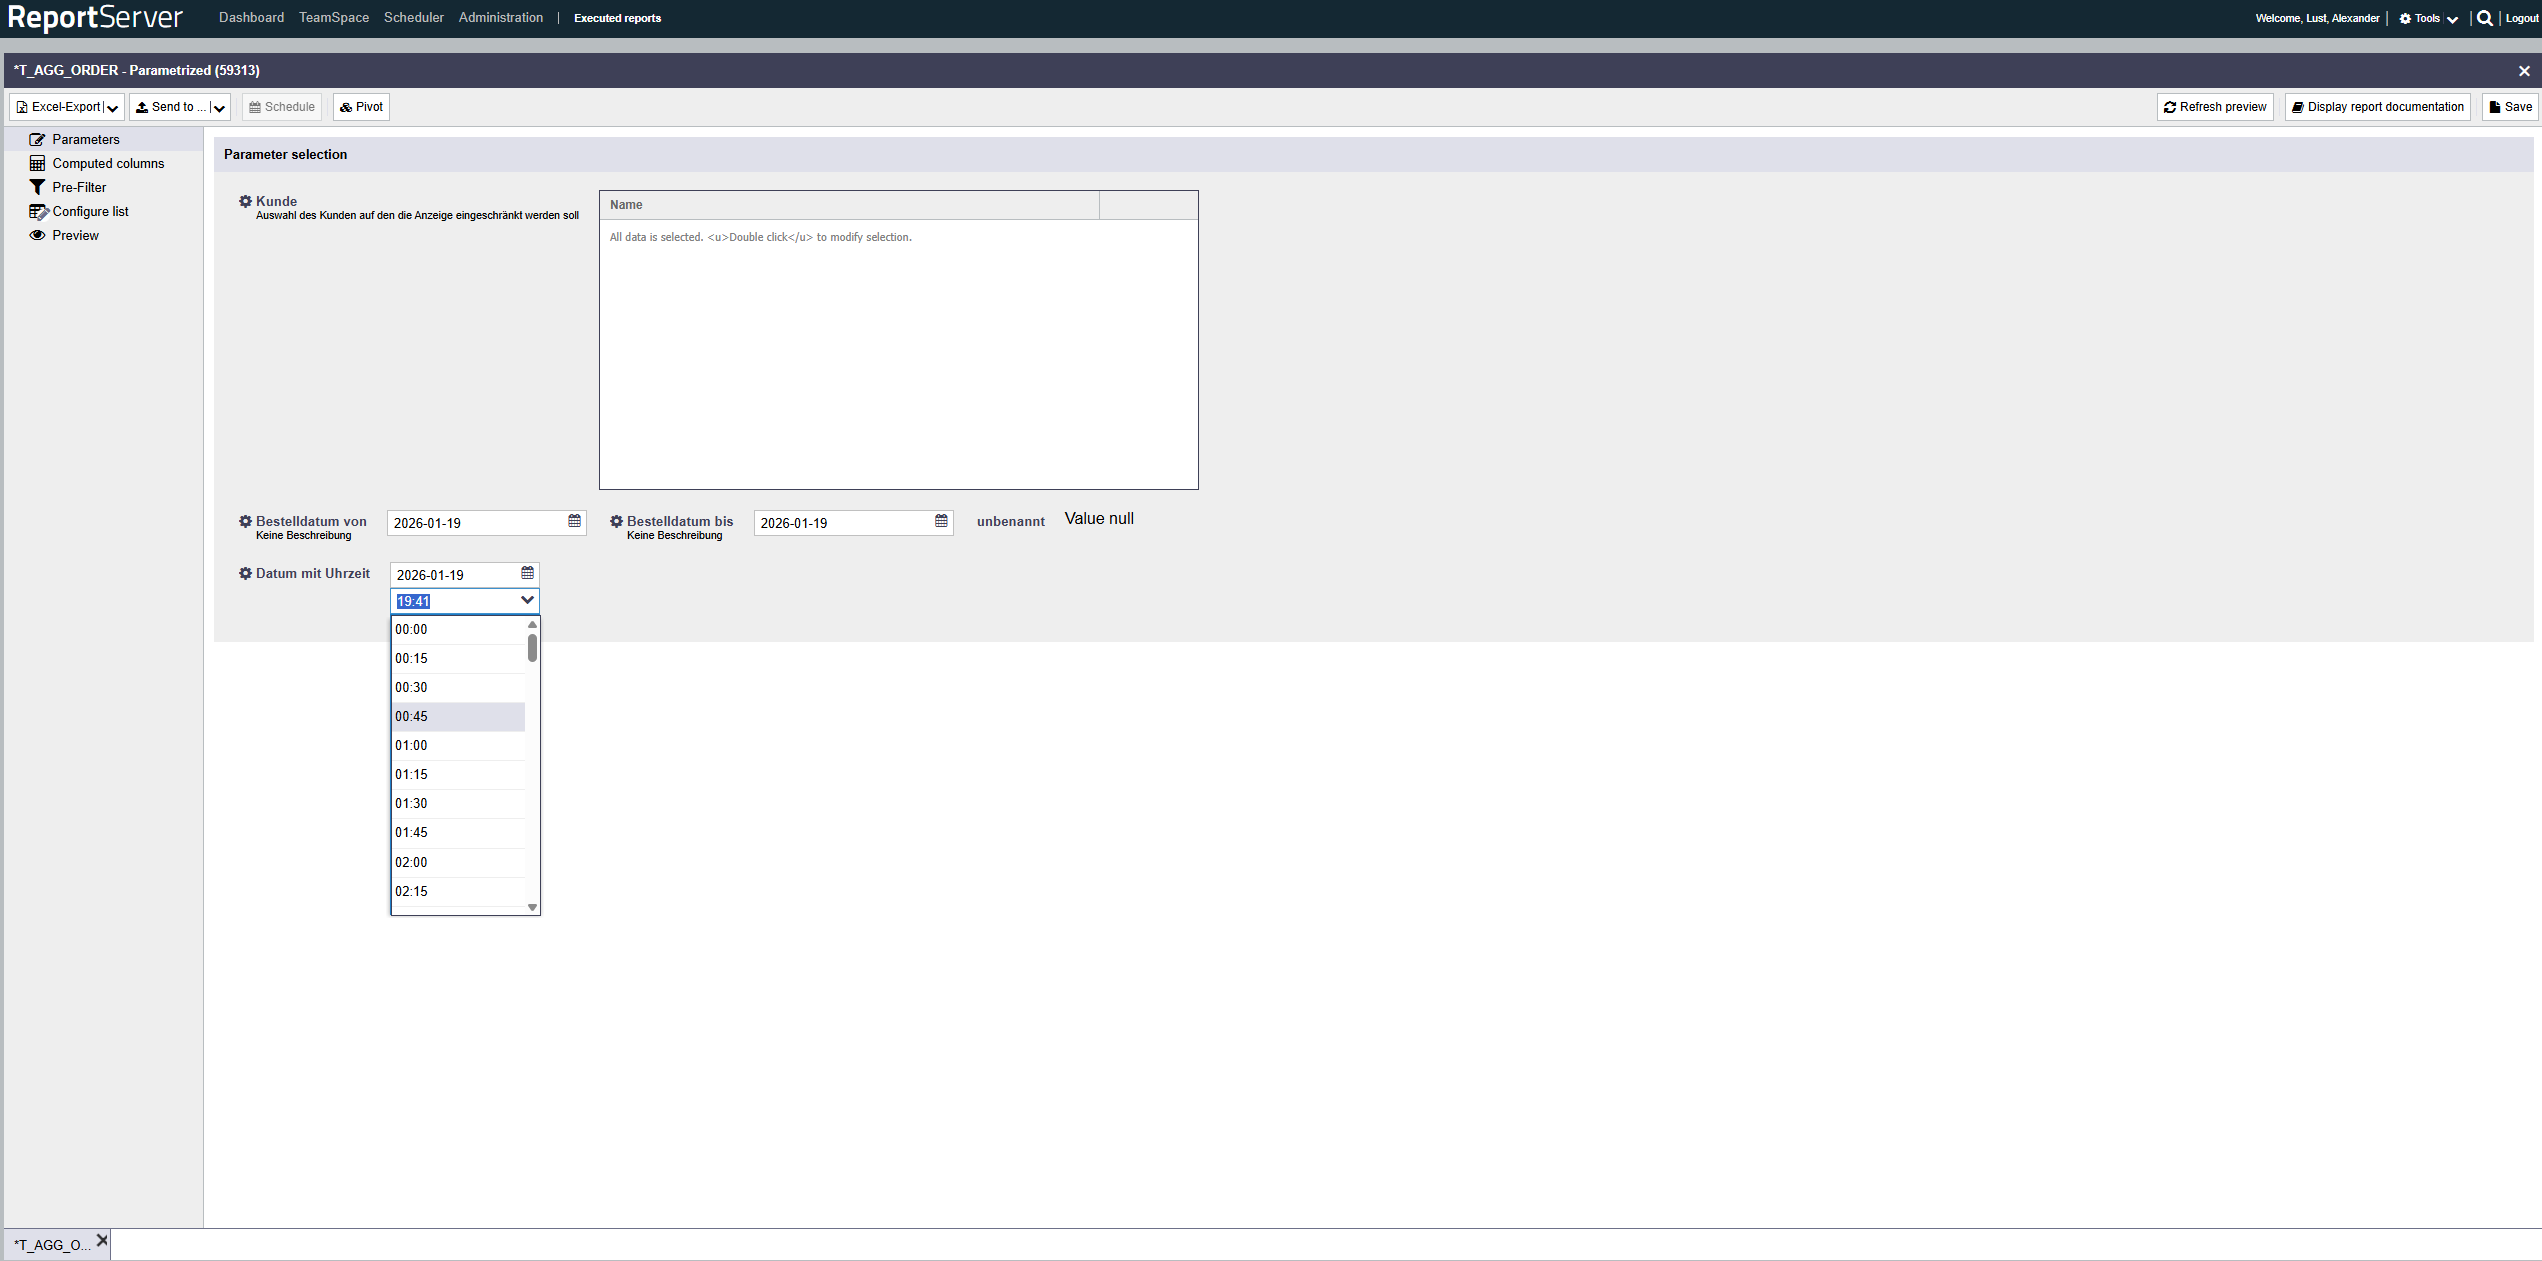
The date parameter allows you to select a date. To select the date, click the icon to the right of the input field. A calendar opens, allowing you to conveniently select the date.
If the parameter additionally supports a time (date/time), a separate selection list for the time is shown below the date field. You can then select the time via a dropdown list.
Selection lists allow you to select one or more values from a predefined list. Selection lists can be displayed in different ways:
| Dropdown | Allows you to select a single value from a drop-down list. If you do not explicitly select a value, the first entry in the list is used. |
| Radio buttons | Radio buttons also allow selection of a single value. However, all available values are visible directly. |
| Multiple selection | A list of all selected values is displayed. To change the selection, double-click in the list. A window opens where the possible values are shown on the left and the currently selected values on the right. To select values, drag them from left to right. To save the selection, click . Please note that an empty selection is interpreted as all data is selected. This differs from manually selecting all available values. If the data basis changes, an empty selection will automatically include new values; if you manually selected all values, the selection remains exactly as it is, and newly added or changed values are not included. |
| Checkboxes | Another view for selecting multiple values. |
Special parameters are individually programmed parameters that implement specific requirements. Examples include selecting an area on a map or selecting values with search. If a configuration option is available that does not correspond to any of the parameter types described above, it is such a special parameter. In this case, your report developer will tell you how to use it.
The Preview aspect shows a detailed preview of the report with the current configuration. Note that generating the preview executes the report with current data and may take a few moments depending on the report.
Once a report has been fully configured, you can execute it. This means the report is filled with current data from the data warehouse and converted into the desired target format. Which formats are available depends on the report type. Graphical reports are usually exported to PDF, as this guarantees pixel-perfect rendering and is well suited for printing. Dynamic Lists, on the other hand, are usually exported as an Excel worksheet.
To execute/export a report, select the entry for the desired format from the toolbar at the top left. Depending on the format, additional settings may be available. The finished report is then offered for download.
All configuration settings made for a report (e.g. set parameters) can be saved in report variants. Note that only configuration settings are saved, not the current report data; the data is loaded again each time the report is executed. To save a variant, select the button in the toolbar. You can then enter a name and an additional description for the variant. The variant is stored in the TeamSpace in the same folder as the report that was opened previously. If you are already working on a variant, you can either update the current variant ("") or create a new variant ("").
All settings stored in a variant are clearly summarized in the report documentation. This ensures that even individual evaluations are always traceable and audit-proof.
Saved variants can be scheduled and executed automatically at defined times and, for example, sent by email. Select the option from the toolbar. Further information on scheduling and managing scheduled reports can be found in Chapter 9.