Chapter 5. Dashboard
The Dashboard module is structured similarly to other modules. At the top you will find a global toolbar. The available dashboards are listed on the left, and the currently selected dashboard is shown in the center. If you have not created a dashboard yet, you will see the empty dashboard. Using the menu in the toolbar, you can manage dashboards. The following options are available:

| Edit dashboard | Allows you to rename the dashboard, set a description, and choose the layout. The layout determines how components (so-called dadgets) are arranged on the dashboard. You can choose between a one-column layout, various two-column layouts, and a three-column layout. |
| Edit order | Allows you to change the order of the dashboards. |
| New dashboard | Creates a new dashboard. |
| Import dashboard | Administrators can provide predefined dashboards for you. Using you can add such a dashboard to your account. Please note that imported dashboards cannot be modified. |
| Remove dashboard | Deletes the currently active dashboard. |
To place a new component (a so-called dadget) on the current dashboard, select from the toolbar. The following dadgets are available:
| Bookmarks | A dadget that displays objects marked in the TeamSpace for quick access. |
| Library dadget | Allows you to embed predefined dadgets. |
| Parameter dadget | Allows you to set parameters for each report dadget on the current dashboard. |
| Report dadget | Displays a report on the dashboard. |
| Static HTML dadget | Allows experts to create custom content using HTML and JavaScript. |
| URL dadget | Allows you to embed arbitrary websites in the dashboard. |
Dadgets always consist of a single window in which the associated information is displayed. You can move dadgets on the dashboard using drag-and-drop (via the window title bar). Using the icons at the top of the dadget window, you can reload the dadget, edit its configuration, or remove the dadget.
In the following, we take a closer look at the individual dadgets.
Bookmarks allow quick access to your most important reports. To add an object to your bookmarks, select it in the TeamSpace and choose from the context menu (right mouse button). The object is then listed in the Bookmarks dadget. To jump directly to the TeamSpace, simply double-click the object in the Bookmarks dadget.
Administrators can provide you with fully configured dadgets. Using the Library dadget, you can embed these in your dashboard. In the configuration of the Library dadget, you can choose from the dadgets that have been enabled for you.
The Parameter dadget collects all parameters of all report dadgets that are currently placed on the dashboard and displays them together. If two reports use the same parameter---for example, if both reports allow setting the "year"---this parameter is shown only once.
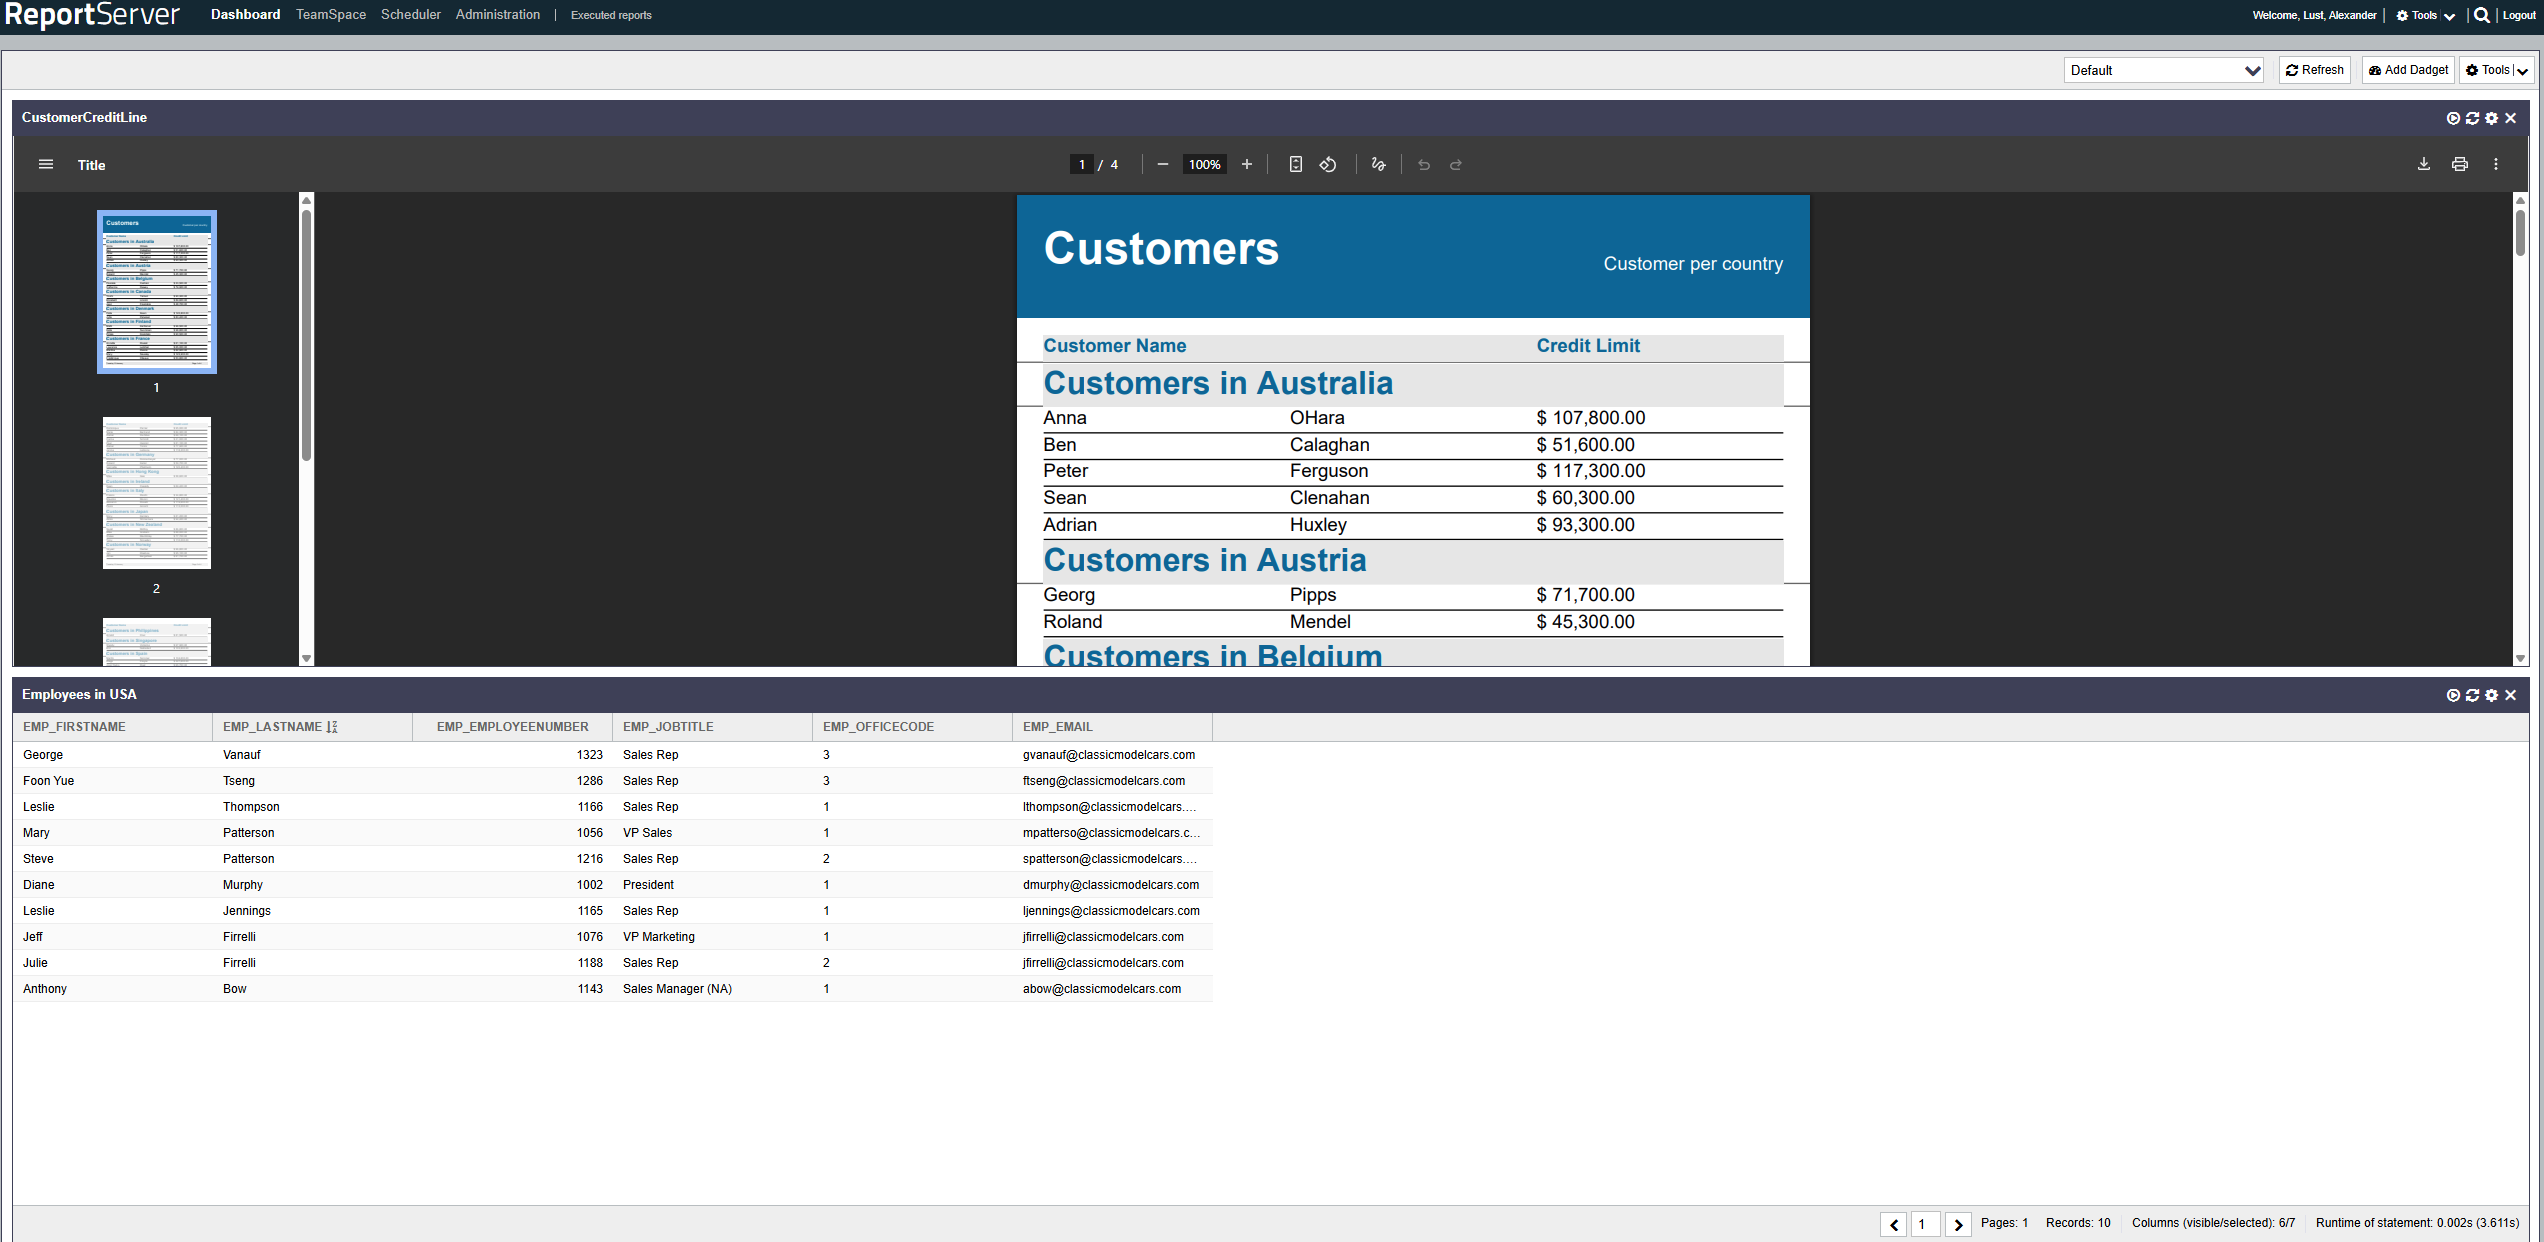
The Report dadget allows you to embed arbitrary reports in the dashboard. For configuration, first select the report to be displayed and then choose the desired view. When selecting the report, you can choose reports from one of your TeamSpaces or, provided you have the required permissions, from the global catalog.
Depending on the report type, different views are available. For example, you can usually choose between the normal preview or an HTML export as the display. For analysis reports or Dynamic Lists in pivot mode, you can additionally choose a chart view.
For experts, the HTML dadget allows direct programming of a dadget using HTML and JavaScript.
With the URL dadget you can embed any website in your dashboard. This is particularly useful to include information from other systems, e.g. a local intranet. For configuration, simply enter the corresponding URL. Please note that you must include the protocol in the URL, i.e. write https://www.example.com/ instead of www.example.com.